


Welcome to TECH STUDIO.
Today we discuss about a how to make a Self balancing robot using Arduino.
Get it on YouTube NoW!
TO make this we need:
1. Arduino UNO
2. mpu 6050
3. L298N Motor driver
4. 2x DC Motor
5. Jumper Wire
6. Lipo Battery

About the components:
1. Arduino UNO: This is a micro controller. It has the ATmega328p ic. Mainly C programming are used to control the arduino. To connect it with your computer it has Arduino IDE software.
 |
| ARDUINO UNO |
2. MPU6050 : MPU6050 is basically a sensor for motion processing devices. It is the world first six dimension motions tracking device. It was designed for low cost and high performances smartphones, tablets and wearable sensor. It is capable of processing nine-axis algorithms, it captures motion in X, Y and Z axis at the same time.
 |
| MPU 6050 |
3. L298N Motor Driver :The L298N is a dual H-Bridge motor driver which allows speed and direction control of two DC motors at the same time. The module can drive DC motors that have voltages between 5 and 35V, with a peak current up to 2A. This depends on the voltage used at the motors VCC.
 |
| L 298N MOTOR DRIVER |
4. DC GEARED MOTOR :Geared DC motors can be defined as an extension of DC motor which already had its Insight details demystified here. A geared DC Motor has a gear assembly attached to the motor.This concept where gears reduce the speed of the vehicle but increase its torque is known as gear reduction.
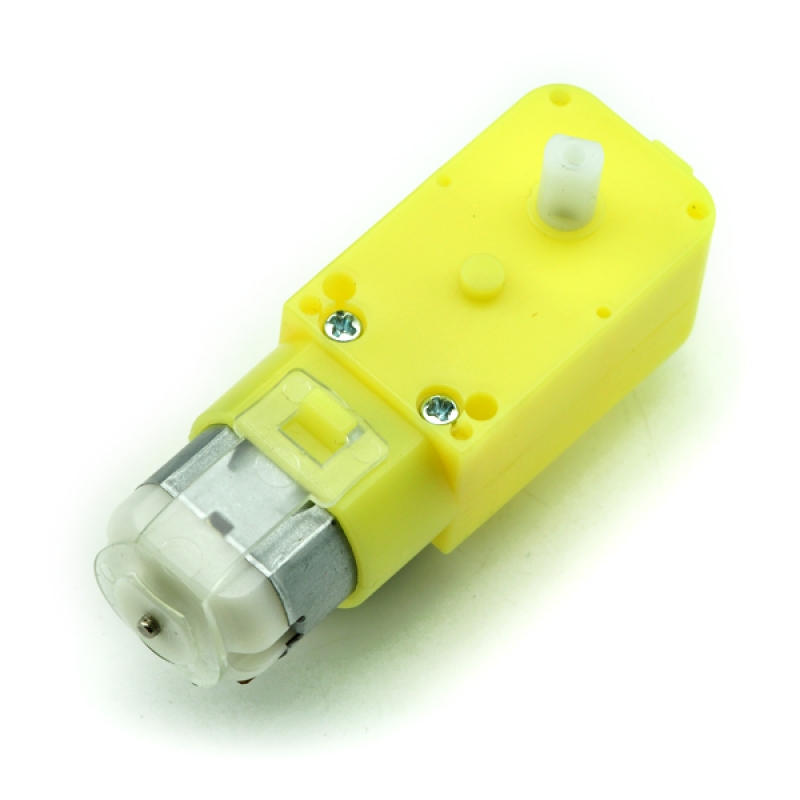 |
| DC MOTOR |
5. JUMPER WIRE : A jump wire is an electrical wire, or group of them in a cable, with a connector or pin at each ... and ease of insertion on a breadboard allows increasing the mounting density of both components and jump wires without fear of short-circuits
 |
| JUMPER WIRE |
6. LIPO BATTERY : A lithium polymer battery, or more correctly lithium-ion polymer battery (abbreviated as LiPo, LIP, Li-poly, lithium-poly and others), is a rechargeable battery of lithium-ion technology using a polymer electrolyte instead of a liquid electrolyte.
 |
| LIPO BATTERY |
HOW TO DO :
- Firstly you have to make the structure.
- The structure must have three layers.
- The ground one is for the placing of motors and wheels.
- The middle one is for the placing of the Arduino board and L298 Motor Driver.
- The upper layer is for the placing of Mpu6050 sensor and the lipo battery.
- After finishing the structure you have to make the circuit connection.
CIRCUIT DIAGRAM :
The Circuit Diagram is here -- https://bit.ly/2vBAICg
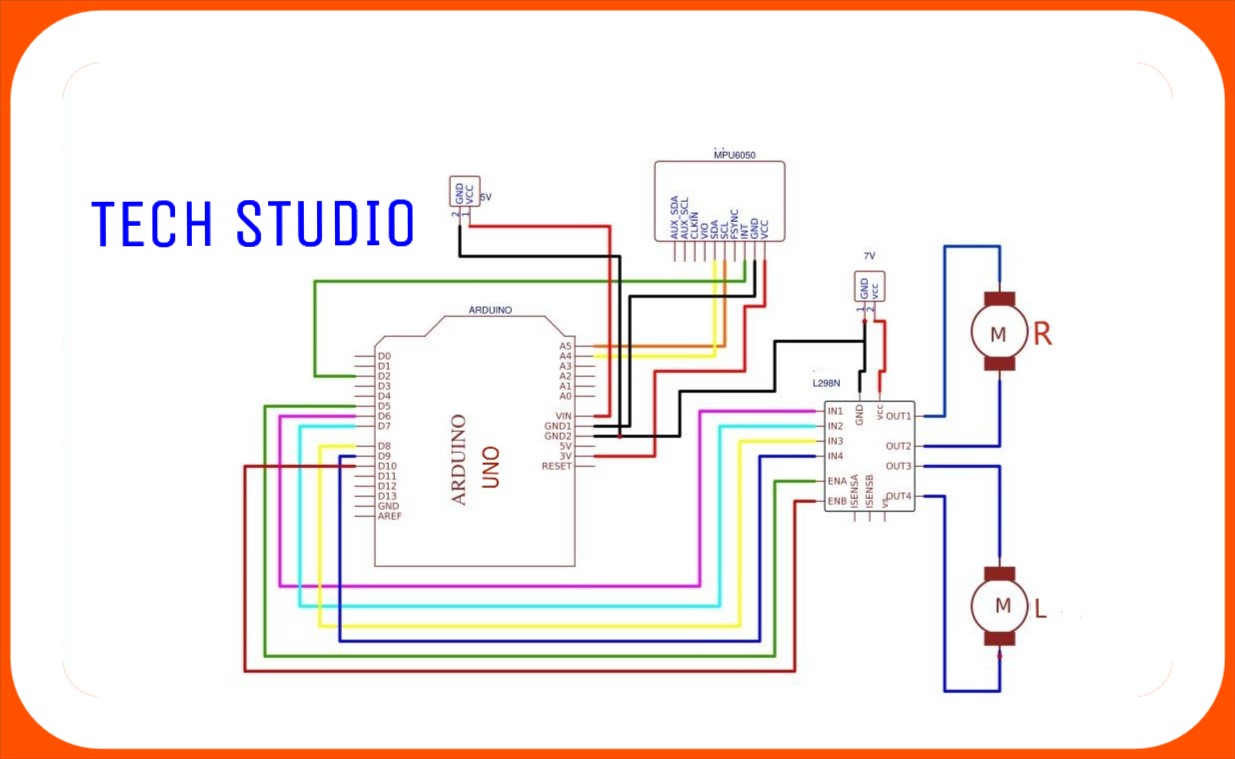 |
| CIRCUIT DIAGRAM |
CODE :
You can get the complete code from here -- https://bit.ly/2QsPNgt
All the libraries are available here :
1. MPU6050 -- https://bit.ly/2Qsauta
2. L298N Motor Controler -- https://bit.ly/33vfy5b
3. PID Library -- https://bit.ly/2U5yvbL
4. i2Cdev Library -- https://bit.ly/3dcytWT
To get the live demonstration see the video.
You can get the video link here -- https://youtu.be/NV5c0ZYggOw
Hope You will enjoy this video.


